I'd love to try this bread recipe and want to know how long to let the bread dough rise. Thank you so very much! Susan
Gifts from the Land, and a Kid-Friendly Bread Recipe
jump to our recipe: little breads
It’s winter here in Vermont, and if you look out your window, it may not seem like much is happening on the Land. The reality is, the Land is very much alive, and has gifts to share with us all year long!
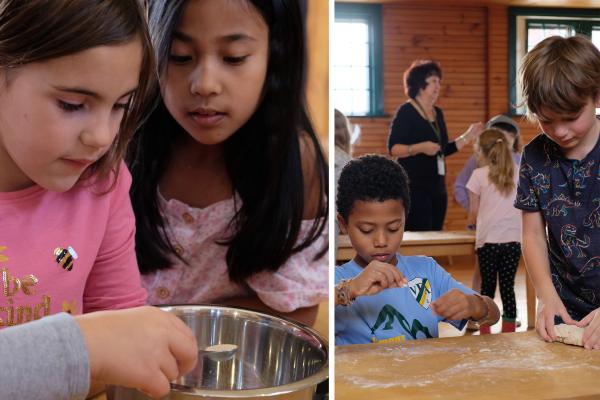
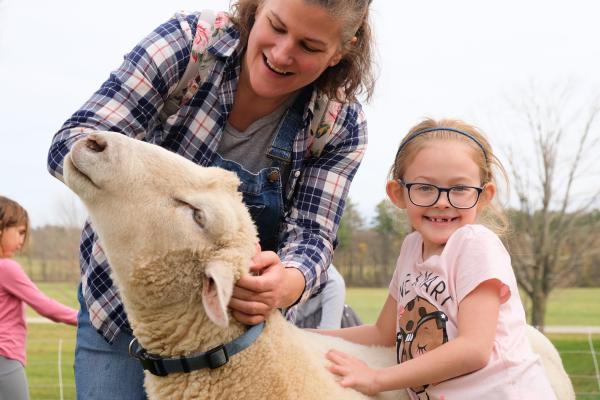
In a recent school program with Shelburne Community School second graders, we explored the important role farms play in our lives, from the delicious and nutritious food they provide, to the raw materials like fiber that we use to make clothes and so many household items. We call this program “Farm to You” because we put the farm in students’ hands – literally! Students worked with materials directly from the Land: they used beeswax to make hand-dipped candles, combined sheep lanolin and dried herbs into hand salve, turned wool yarn into embroidery art, shook cream into butter, and finally transformed flour into rolls.
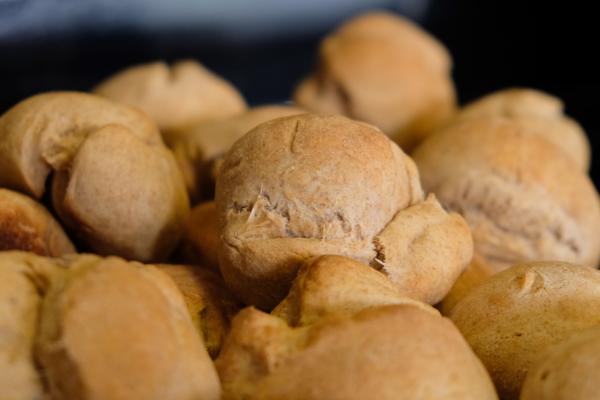
Knowing where our food and fibers come from helps kids understand their relationship with the natural world. Talking about this connection – that food comes from nature, both plants and animals – is foundational to one of the Big Ideas of Sustainability, Interdependence: we rely on each other and other living things to meet our needs.For an upcoming holiday or even as a fresh-from-the-oven gift, I’m sharing our go-to bread recipe for rolls, or “little breads,” that you can make with your own family as you talk about the wheat to bread connection. When you’re done, spend some time outside together to show your thanks and appreciation for all the Land provides!
Recipe: Little Breads
Recipe makes approximately two dozen rolls. View this recipe as a PDF.
You can also easily make homemade butter from heavy cream (here's a blog with a butter recipe). There are all kinds of ways to make bread and butter your own, like mixing in chopped herbs from the garden, or salt or cinnamon from your pantry.
Ingredients
- 1 ¾ c. warm water (wrist temperature)
- 1 tbsp. active dry yeast
- 2–3 tbsp. maple syrup
- 1 tsp. salt
- ¼ c. vegetable oil
- 4–5 c. flour (mix of wheat and white)
Instructions
- Combine water, yeast, and maple syrup in a large mixing bowl. Allow a few minutes for the yeast to activate (children love to watch this!).
- Stir in a handful of flour. Stir in salt and oil.
- Add remaining flour one cup at a time to ensure you don’t make the dough too dry. Mix until combined but not sticky.
- Knead dough on a floured surface until it forms a ball.
- Oil a bowl and place the dough inside. Cover with a damp cloth, and let rise in a warm place for 20–30 minutes. (We typically make this recipe under time constraints with school groups, but if time permits in your kitchen, allow dough to rise until it has doubled in size, about 45–60 minutes.) Preheat oven to 375° as you wait for your dough to rise.
- Divide dough into dinner-roll-sized pieces, have children knead the dough into any shape they like, and place on a cookie sheet.
- Bake at 375° for 10-15 minutes or until golden brown. While the rolls are baking, it’s an excellent time to make butter to put on your warm bread, or discuss the journey of wheat to bread!
More ways to learn about wheat to bread:
- Watch this short video on YouTube, Breads from Around the World.
- Read Sun Bread by Elisa Kleven.
- Print and arrange these wheat to bread cards as a family to illustrate the seed to table journey.
A note on capitalization: I capitalize the word Land as a way of acknowledging and honoring the Earth. The Land provides us with so much; capitalizing it is a form of showing reverence and gratitude.
Comments
Hi Susan, thanks for your question. We typically complete this recipe with school programs when we're short on time. You could let the dough rise for as little as 20–30 minutes, or as much as 45–60 minutes. (A second rise once you've formed your rolls would only lead to a fluffier end result!) We've added this guidance to our instructions, too. Hope that helps.


